Photography is both an art and a science that involves capturing images through the use of light It involves using a camera to record moments, scenes, or subjects on a photosensitive medium, such as film or a digital sensor. Photography encompasses various techniques and styles, ranging from simple snapshots to complex compositions that convey a narrative or evoke emotions. As both a technical skill and an artistic medium, photography allows individuals to document reality, express creativity, and share perspectives with the world.
- Historical Overview: A Journey Through Time
- Fundamentals of Photography
- Camera Equipments
- Exposure Techniques:
- Composition Techniques
- Lighting Techniques
- Portrait Photography
- Landscape Photography
- Macro Photography
- Wildlife Photography
- Event and Wedding Photography
- Commercial and Product Photography
- Fine Art Photography
- Post-Processing Techniques
- Basic Editing Techniques
- Creative Techniques and Styles
- Working with Clients and Models
Historical Overview: A Journey Through Time
Photography has a rich and fascinating history that traces the evolution of capturing images from its earliest beginnings to the sophisticated technology we have today. This journey begins with the camera obscura, an ancient optical device that projected an image of its surroundings onto a surface. This principle laid the groundwork for future photographic innovations.
The advent of the daguerreotype in the 19th century marked a significant milestone. Created by Louis Daguerre, this technique entailed producing a precise image on a silver-coated copper plate. It was the first publicly available photographic process and captivated the world with its ability to capture reality with unprecedented clarity.
As time moved forward, advancements in film photography opened up new opportunities. The invention of roll film by George Eastman made photography more accessible to the public, allowing for portable cameras and the popularisation of photography as a hobby and art form.
The 20th century witnessed the transition into the Digital Age, revolutionising the way images are captured, processed, and shared. Digital photography has transformed the practices of both professionals and amateurs by providing the ease of immediate review and editing. With the rise of smartphones, photography became an integral part of daily life, enabling people to document and share their experiences instantly.
Throughout its history, photography has continuously evolved, influenced by technological advancements and cultural changes. Each era brought new techniques and styles, shaping the medium into a versatile and powerful tool for storytelling, documentation, and artistic expression.
Fundamentals of Photography
A strong foundation in the fundamentals is crucial for any aspiring photographer. Exposure refers to the amount of light allowed to reach the camera sensor or film, controlled by the interplay of aperture (the size of the lens opening), shutter speed (the duration the shutter remains open), and ISO (the sensitivity of the sensor or film to light).
Composition involves arranging elements within the frame in a visually appealing and meaningful way, utilizing principles like the rule of thirds, leading lines, and symmetry. Lighting, both natural and artificial, plays a vital role in shaping the mood and revealing details within a photograph.
Understanding the direction, intensity, and quality of light is essential for creating impactful images. Perspective refers to the viewpoint from which a photograph is taken, influencing the way objects are perceived in terms of their size and spatial relationships. Varying your viewpoint while capturing a scene can enhance its visual appeal and complexity.
Camera Equipments
Types of Cameras:
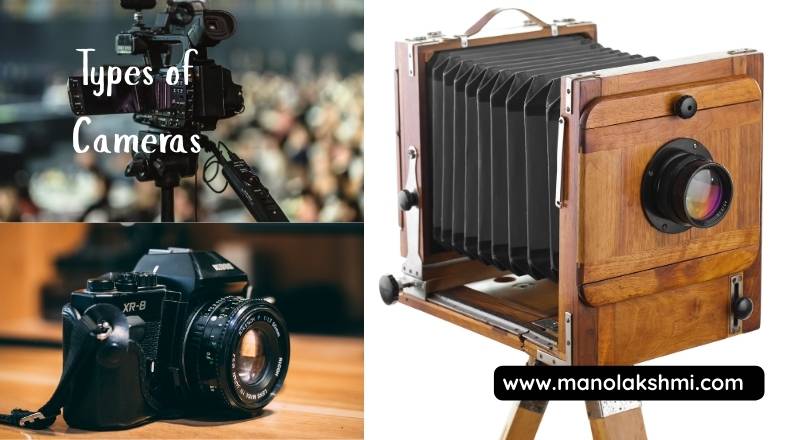
Digital Single-Lens Reflex (DSLR): Cameras have a mirror and prism system that enables photographers to view the precise image captured by the lens. Digital single-lens reflex cameras (DSLRs) are characterized by their optical viewfinders, durable construction, and a wide array of compatible lenses. They typically offer excellent image quality and fast autofocus, making them suitable for a wide range of photography genres, including sports, wildlife, and portraiture.
Mirrorless Cameras: Unlike DSLRs, mirrorless cameras do not have a reflex mirror. In contrast to traditional cameras, mirrorless cameras allow light to travel unimpeded through the lens to the image sensor. These cameras offer photographers two composition methods: an electronic viewfinder (EVF) or the rear LCD screen. DSLR cameras tend to be larger and heavier compared to mirrorless models. Mirrorless cameras often boast sophisticated capabilities, including built-in image stabilization and intricate autofocus technologies featuring face and eye recognition. They have become increasingly popular among professionals and enthusiasts alike.
Point-and-Shoot Cameras: These are compact and user-friendly cameras designed for simplicity. They typically have fixed or limited zoom lenses and automated settings, making them ideal for casual snapshots and travel photography. While their image quality and manual control options may be more limited compared to DSLRs and mirrorless cameras, they are highly portable and easy to use.
Film Cameras: These traditional cameras capture images on photographic film rather than a digital sensor. Film photography offers a unique aesthetic and a more tactile shooting experience. Different film formats (e.g., 35mm, medium format, large format) offer varying levels of image detail and require different cameras and development processes. While digital photography dominates the market, film photography continues to be appreciated for its artistic qualities and nostalgic appeal.
Lenses:
Focal Length: Focal length, measured in millimeters (mm), influences a lens’s angle of view and magnification. Shorter focal lengths (e.g., 16mm, 24mm) provide a wide angle of view, suitable for landscapes and architectural photography. Longer focal lengths (e.g., 85mm, 200mm, 400mm) offer a narrower angle of view and magnify distant subjects, ideal for portraiture and wildlife photography.
Aperture: Also known as the f-stop (e.g., f/1.8, f/5.6, f/11), the aperture refers to the opening within the lens that controls the amount of light passing through to the sensor. A smaller f-number (wider aperture) lets in more light, resulting in a shallow depth of field with a blurred background, a technique frequently used in portrait photography. A narrower aperture (larger f-number) lets in less light and results in a greater depth of field (more of the scene in focus), suitable for landscapes.
Prime vs. Zoom Lenses: Prime lenses have a fixed focal length (e.g., 50mm, 85mm), while zoom lenses offer a range of focal lengths (e.g., 24-70mm, 70-200mm). Prime lenses are often sharper, have wider maximum apertures, and are more compact than zoom lenses. Zoom lenses offer greater versatility, allowing photographers to adjust the focal length without changing lenses.
Lens Types:
- Wide-angle Lenses: These lenses have short focal lengths (typically under 35mm) and capture a broad field of view, making them ideal for landscapes, interiors, and group photos.
- Telephoto Lenses: These lenses have long focal lengths (typically over 70mm) and magnify distant subjects, suitable for sports, wildlife, and portrait photography.
- Macro Lenses: These specialized lenses are designed for close-up photography. Allowing for high magnification of small subjects like insects and flowers.
Accessories:
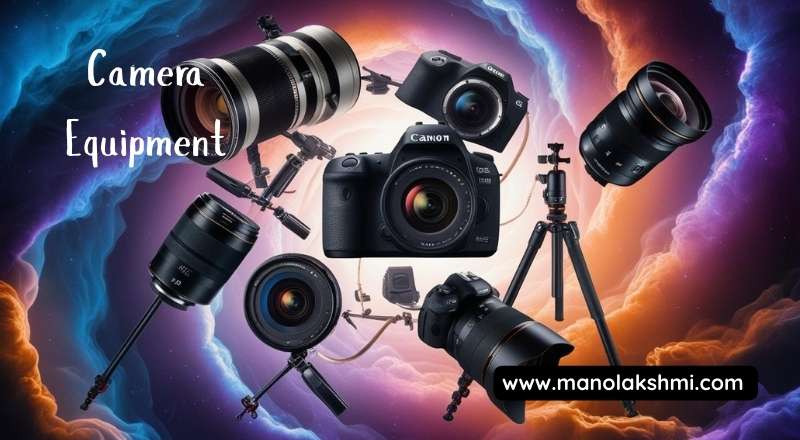
- Tripods: These three-legged supports provide stability for cameras, especially during long exposures, low-light conditions, or when using long telephoto lenses. They help prevent camera shake and ensure sharp images.
- Filters: These glass or plastic attachments are mounted on the front of a lens to modify the light entering the camera.
- UV Filters: Primarily used to protect the front element of the lens from scratches and dust, they may also slightly reduce haze.
- Polarizing Filters: Polarizing filters minimize reflections and glare from surfaces such as water and glass. These filters are capable of enhancing the color saturation and contrast of both skies and greenery.
- Neutral Density (ND) Filters: (Neutral density) Filters decrease the intensity of light entering the camera lens while maintaining the original color fidelity. This enables photographers to use slower shutter speeds in bright light for motion blur effects or wider apertures for shallow depth of field.
- Remote Shutters: These devices allow photographers to trigger the camera’s shutter without physically touching the camera, minimizing the risk of camera shake during long exposures or when using a tripod.
- Light Meters: These tools measure the intensity of light falling on a subject, helping photographers determine the correct exposure settings (aperture, shutter speed, ISO) for properly exposed images. While modern cameras have built-in light meters, external light meters can offer more precise readings, especially in challenging lighting situations.
Camera Settings:
- ISO: The camera’s image sensor’s responsiveness to light is managed by this setting. A lower ISO (e.g., ISO 100) is less sensitive and produces cleaner images with less noise, typically used in bright lighting conditions. A higher ISO (e.g., ISO 1600, 3200, or higher) is more sensitive to light, allowing for shooting in darker conditions, but may introduce more digital noise or grain in the image.
- Shutter Speed: The shutter speed controls the duration the camera’s shutter stays open, which dictates how much light hits the sensor. Shutter speed is measured in seconds or fractions of a second (e.g., 1/1000s, 1/60s, 1s). Fast shutter speeds freeze motion, while slow speeds produce motion blur for artistic purposes.
- Aperture (f-stop): As mentioned earlier, the aperture controls the size of the lens opening and affects both the amount of light entering the camera and the depth of the field. A wide aperture (small f-number) creates a shallow depth of field, blurring the background and isolating the subject. Conversely, a smaller aperture ( f-number) creates a greater depth of field, ensuring more of the scene remains in focus.
- White Balance: This setting adjusts the color temperature of an image to ensure that white objects appear white under different lighting conditions (e.g., daylight, incandescent, fluorescent). Unnatural color casts in images can occur due to incorrect white balance. Cameras typically offer automatic white balance settings as well as presets for various lighting conditions and the option for manual adjustments.
Exposure Techniques:
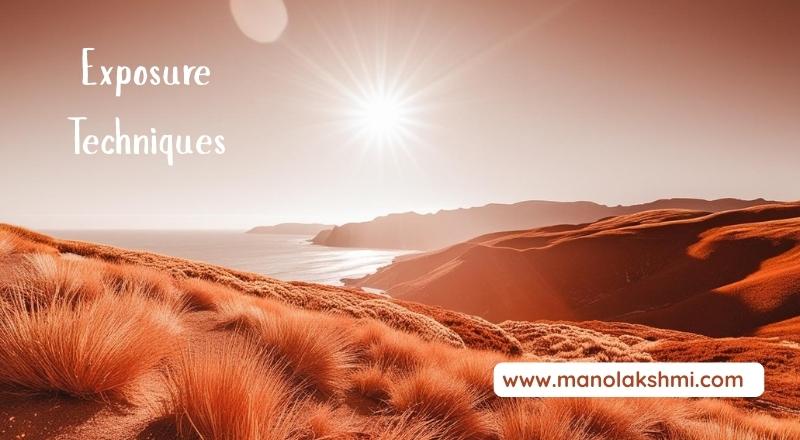
Photography’s foundation lies in exposure, which dictates an image’s overall brightness. Achieving proper exposure involves a delicate balance between three key elements, often referred to as the Exposure Triangle:
Aperture:
The aperture is the adjustable opening inside a camera lens that regulates the quantity of light reaching the image sensor. Aperture is measured using f-stops, such as f/2.8, f/5.6, and f/11.A lower f-number indicates a wider aperture, which lets in more light and produces a shallow depth of field with a blurred background. A higher f-number (narrower aperture) reduces the amount of light entering the camera and increases the depth of field, bringing more of the scene into focus.
Shutter Speed:
Camera exposure time is the length of time a camera’s image sensor is exposed to light, measured in seconds or fractions thereof (e.g., 1s, 1/60s, 1/1000s). Faster shutter speeds freeze motion, while slower speeds produce motion blur.
ISO:
The camera sensor’s light sensitivity. A lower ISO (e.g., ISO 100) is less sensitive and produces cleaner images with less noise, typically used in bright conditions. A higher ISO (e.g., ISO 1600, ISO 6400) is more sensitive, allowing for shooting in low-light situations but potentially introducing more digital noise.
Understanding how these three elements interact is crucial for controlling the exposure and achieving the desired creative effect. The histogram, a graphical representation of the tonal values in an image, is a valuable tool for evaluating exposure.
The display shows how shadows, midtones, and highlights are distributed. A well-exposed image typically has a histogram that spans the entire range without being clipped at either end (indicating lost detail in the shadows or highlights).
Camera Metering modes define the various methods a camera employs to assess the light within a frame, enabling it to calculate the ideal exposure. Photographic metering modes commonly include evaluative or matrix metering.
Which analyzes the entire scene for optimal exposure; center-weighted metering, which prioritizes the exposure of the frame’s center; and spot metering, which measures the light in a small, specific area.
Bracketing
Bracketing is a technique where you take a series of photographs of the same scene with slightly different exposure settings. This is particularly useful in challenging lighting conditions where it’s difficult to determine the perfect exposure or when you intend to create a High Dynamic Range (HDR) photograph.
Typically, a bracketed sequence includes an image exposed according to the camera’s meter reading, one or more underexposed images (darker), and one or more overexposed images (brighter).
The difference in exposure between each shot is often referred to as an exposure bracket, measured in stops (e.g., +/- 0.5 stop, +/- 1 stop). These bracketed images can then be combined in post-processing using tone mapping techniques to create a single image with a wider dynamic range than what a single exposure could capture.
Long Exposure
Long exposure photography involves using a slow shutter speed to intentionally blur moving elements in a scene while keeping static elements sharp. This technique is commonly employed in night photography to capture light trails from cars or stars, or to create a smooth, ethereal effect on moving water, often referred to as water effects.
To achieve long exposures, a tripod is usually necessary to stabilize the camera for the duration of the shot.Neutral density (ND) filters may also be necessary in daylight conditions to reduce the amount of light entering the lens, allowing for longer shutter speeds.
High Dynamic Range (HDR) Photography
High Dynamic Range (HDR) photography is a technique used to capture a greater range of tonal detail than is possible with a single exposure. It involves capturing multiple images of the same scene at different exposure levels (bracketing) and then merging images in post-processing software.
This process combines the well-exposed parts of each image to create a final image with a significantly wider dynamic range, revealing detail in both the darkest shadows and brightest highlights. Effective HDR processing requires careful attention to post-processing techniques to avoid unnatural-looking results, such as excessive haloing or overly saturated colors.
Composition Techniques

Basic Composition Rules
These fundamental guidelines serve as a strong foundation for creating visually appealing images.
Rule of Thirds: Visualize your composition area overlaid with two horizontal and two vertical lines, creating a grid of nine equal rectangular sections. Placing key elements along these lines or at their intersections creates more interest and balance than centering the subject. This off-center placement often leads to a more dynamic and engaging composition, drawing the viewer’s eye through the scene.
Leading Lines: Guide the viewer’s eye to the key element or focal point of the scene using existing lines, whether natural or artificial. These lines can be roads, rivers, fences, or even implied lines created by the arrangement of objects. Leading lines are effectively used in composition to create depth and guide the viewer’s eye, resulting in a sense of flow and narrative.
Framing: Frame your primary subject using elements present in the scene, like trees, archways, or doorways. Isolating the subject is a technique that enhances an image by drawing focus and creating a sense of depth. Framing can also provide context to the scene and enhance the overall visual story.
Balance: Achieve visual harmony by distributing the elements within the frame in a way that feels stable and pleasing to the eye. Balance doesn’t necessarily mean perfect symmetry; it can also be achieved through asymmetrical arrangements.
Where the visual weight of different elements is equalized. Understanding balance helps prevent the image from feeling lopsided or chaotic.
Advanced Composition Techniques
Building upon the basic rules, these techniques offer more sophisticated ways to structure your images and convey specific feelings or ideas.
Golden Ratio: This mathematical ratio (approximately 1:1.618), also known as the Fibonacci spiral, appears in nature and art and is believed to create aesthetically pleasing proportions. Applying the golden ratio to your composition, such as placing key elements along the spiral or at its intersections, can lead to a sense of natural harmony and visual appeal. While not a strict rule, understanding the golden ratio can provide a framework for more sophisticated compositional choices.
Symmetry: Mirroring elements within a composition generates order, formality, and strong visual impact. Symmetry can be particularly effective for architectural photography or when emphasizing stillness and balance. However, be mindful that too much symmetry can sometimes feel static, so consider incorporating elements of asymmetry to add visual interest.
Negative Space: Just as important as your subject are the empty areas that surround it. Negative space can help to isolate the subject, emphasize its importance, and create a sense of calm or drama. Effectively utilizing negative space allows the subject to “breathe” and prevents the composition from feeling cluttered.
Minimalism: This approach emphasizes simplicity and reducing the number of elements in the frame to the bare essentials. Minimalism can create a powerful impact by focusing the viewer’s attention on the main subject and conveying a sense of clarity and intentionality. It often involves significant use of negative space.
Perspective and Depth
Creating a sense of three-dimensionality on a two-dimensional surface is crucial for engaging the viewer and making the image feel more immersive.
Foreground: Viewers perceive foreground elements as the closest objects in an image. These elements are crucial for creating a sense of scale and depth. Including interesting details in the foreground can draw the viewer into the scene and create a more layered composition.
Middle Ground: The middle ground occupies the space between the foreground and the background and often contains the main subject or elements that support it. It transitions between depth planes, aiding in the connection of the foreground and background.
Background: The background provides context for the main subject and can contribute to the overall mood and atmosphere of the image. A well-considered background should not distract from the subject but rather complement it. Examine the background for its colors, shapes, and textures.
Depth of Field: This photographic technique refers to the area of the image that appears sharp and in focus.
Understanding Depth of Field in Photography
Depth of field in photography is the range of distances within a scene that appear sharply focused in the final image. It identifies which areas of the photograph are sharply focused. Photographers can manipulate this to achieve different artistic effects.
Subject Isolation through Shallow Depth of Field
This photographic technique achieves a sharp focus on the subject while blurring the background. The resulting shallow depth of field effectively isolates the subject, drawing the viewer’s eye and emphasizing its importance within the frame.
- Large Depth of Field: Results in the entire scene, from the foreground to the background, appearing sharp. This is commonly used in landscape photography to ensure all elements are in focus.
By understanding and controlling depth of field, photographers gain a powerful tool for managing focus and creating a sense of depth within their images.
Lighting Techniques
Natural Light Photography:
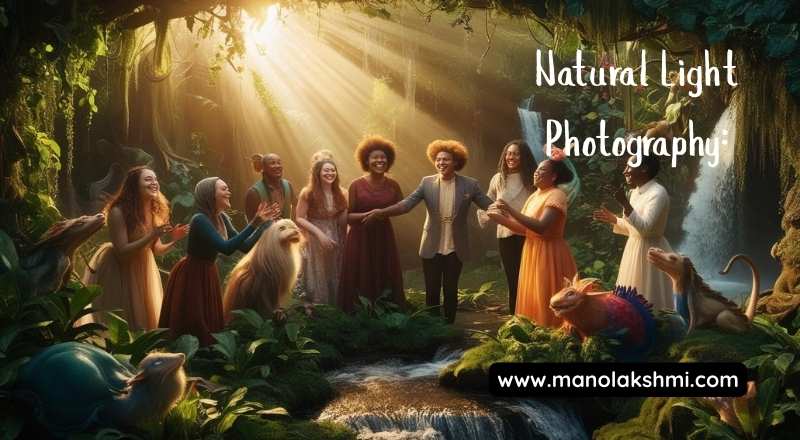
Harnessing the power of the sun, natural light photography involves utilizing ambient light sources to illuminate subjects.
- Golden Hour: The period shortly after sunrise and before sunset, characterized by warm, soft, and golden-toned light, ideal for portraits and landscapes due to its flattering quality and long shadows.
- Blue Hour: The twilight periods preceding sunrise and following sunset present a deep blue sky, creating a unique and serene ambiance ideal for architectural and landscape photography.
- Backlighting: Creating a rim light effect involves placing the light source behind the subject. This technique illuminates the edges of the subject, helping to separate them from the background and enhance the image’s depth.
- Silhouettes: Created by placing the subject between the camera and a strong light source, rendering the subject as a dark shape against a bright background, emphasizing form and outline.
Artificial Lighting:

Photography utilizes artificial light sources to manipulate and direct illumination.
- Flash Photography: Utilizing a brief, intense burst of light from a flash unit, either on-camera or off-camera, to illuminate subjects. This can freeze motion, provide fill light in bright conditions, or act as the primary light source in low-light environments. Techniques include direct flash, bounced flash, and high-speed sync.
- Continuous Light: Employing a constant light source, such as LED panels, fluorescent lights, or tungsten bulbs, which allows for real-time observation of how light affects the subject. Commonly used in video production and still photography.
- Studio Lighting Setup: A controlled environment where various artificial light sources and modifiers are strategically placed to achieve a desired lighting effect. Common setups include three-point lighting (key light, fill light, backlight) and clamshell lighting, used extensively in portrait, fashion, and product photography.
Light Modifiers:
Tools used to alter the quality, direction, and intensity of light, both natural and artificial.
- Softboxes: Enclosures around a light source with a diffusion panel that creates a soft, even, and flattering light with gentle shadows, commonly used in portrait and product photography.
- Umbrellas: Reflective or translucent canopies used to either bounce or diffuse light, providing a broader and softer light source compared to direct light. Available in various sizes and reflective surfaces (e.g., white, silver, gold).
- Reflectors: Surfaces used to bounce existing light onto the subject, filling in shadows and adding highlights. Available in various colors (e.g., white, silver, gold, black), each offering a different effect on the light’s color and intensity.
- Diffusers: Translucent materials placed in front of a light source to scatter the light and reduce its harshness, creating softer shadows and more even illumination.
Creative Lighting Techniques:
Exploring innovative and artistic ways to use light to enhance the mood, drama, and storytelling of an image.
- Light Painting: Light painting is a photographic technique involving long exposures and a handheld light source. During the exposure, the light source is moved to illuminate specific areas of the scene or to create intentional light trails and patterns within the photograph.
- Dramatic Lighting: Strong light and shadow contrasts characterize this technique, often employed to evoke mood, emphasize particular regions, and infuse an image with mystery or intensity. Techniques like chiaroscuro fall under this category.
- Color Gels: Transparent colored sheets placed over light sources to change the color of the light, used for creative effects, mood enhancement, or to correct color temperature.
Portrait Photography
Portrait photography is a genre of photography dedicated to capturing the personality and essence of the subject. It goes beyond simply recording a likeness, aiming to communicate something deeper about the individual or group being photographed. Successful portraiture often involves a careful consideration of several key elements.

Posing:
The way a subject is positioned and arranged within the frame plays a crucial role in conveying the desired message and creating a visually appealing image. This includes their posture, the direction of their gaze, the placement of their limbs, and their overall body language. Different poses can evoke a wide range of emotions and feelings, from confidence and power to vulnerability and introspection.
A skilled portrait photographer will guide their subject to achieve natural and flattering poses that enhance their characteristics.
Emotion:
Capturing genuine emotion is often considered the hallmark of a compelling portrait. Whether it’s joy, sadness, contemplation, or excitement, the ability to freeze a fleeting emotional moment in time can create a powerful connection with the viewer.
This requires the photographer to be not only technically proficient but also adept at creating a comfortable and trusting environment. Where the subject feels at ease to express themselves authentically. Subtle cues in facial expressions and body language can speak volumes and add depth to the portrait.
Environmental Portraits:
This subgenre of portraiture places the subject within their natural surroundings or a context that is relevant to their life, work, or interests. The environment becomes an integral part of the story, providing additional information and insights into the subject’s identity and personality.
The location, the lighting, and the elements within the frame all contribute to the overall narrative of the portrait. Environmental portraits can range from capturing a musician in their studio to a farmer in their field, offering a broader understanding of the individual within their world
Landscape Photography
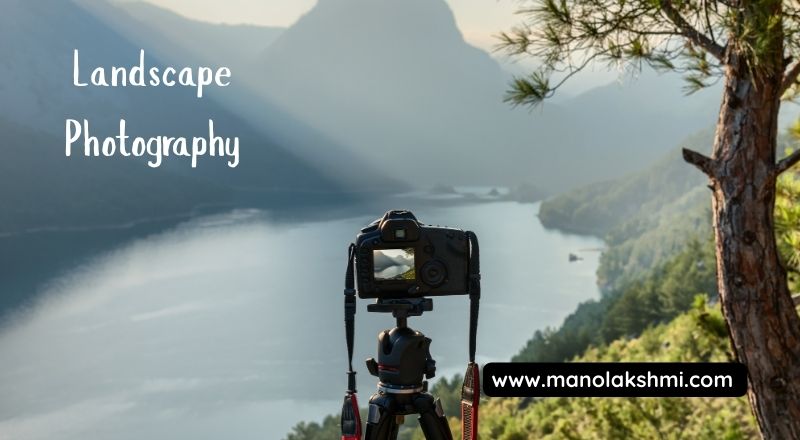
Landscape photography is a photographic genre focused on capturing the aesthetic appeal and vastness of nature. It goes beyond simply documenting a scene, aiming to evoke emotion and convey the photographer’s artistic vision. Key elements that contribute to compelling landscape photographs include:
Composition: How elements are arranged within the frame significantly impacts. How the viewer’s eye moves and the overall feeling of balance or dynamism. Techniques such as the rule of thirds, leading lines, symmetry, and incorporating foreground interest are essential tools for crafting impactful compositions. The placement of key subjects and careful consideration of the horizon line are paramount in a scene.
Time of Day: A landscape’s light quality and overall atmosphere are significantly affected by the sun’s position. Photographers often prefer the “golden hours” around sunrise and sunset because the warm, soft light and elongated shadows enhance depth and texture in their images.
The period known as the “blue hour,” occurring just before sunrise and after sunset, provides a cool and ethereal light. Understanding how light changes throughout the day and planning shoots accordingly is vital for capturing the desired mood.
Weather Conditions:
Weather plays a significant role in shaping the appearance and mood of a landscape. Dramatic skies with clouds, fog, or mist that softens the landscape and creates a sense of mystery, rain that can saturate colors and create reflections, and even the aftermath of a storm can offer unique photographic opportunities. Being adaptable to changing weather conditions and understanding how they can enhance a scene is a key skill for landscape photographers.
Beyond these fundamental keywords, other important aspects of landscape photography include:
Perspective: Experimenting with different viewpoints, such as shooting from a low angle to emphasize foreground elements or from a high vantage point for a panoramic view, can dramatically alter the viewer’s perception of the scene.
Depth of Field: Controlling the depth of field, the area of the image that is in focus, is crucial for directing attention. A wide depth of field keeps everything sharp, emphasizing the vastness of a landscape, while a shallow depth of field can isolate a specific subject against a blurred background.
Gear: While creativity and vision are paramount, appropriate equipment, including a sturdy tripod, wide-angle lenses, and filters (such as neutral density and polarizing filters), can significantly enhance the technical quality and creative possibilities in landscape photography.
Location Scouting:
Researching and exploring potential locations to find interesting and visually appealing subjects and perspectives is an integral part of the process. Understanding the terrain, light patterns at different times of the year, and potential hazards contributes to successful landscape photography.
Post-Processing: Digital editing plays a role in refining landscape photographs, allowing photographers to enhance colors, adjust contrast, and correct imperfections. However, the goal is typically to enhance the natural beauty of the scene rather than to drastically alter it.
In essence, landscape photography is a fulfilling endeavor that merges technical expertise with artistic creativity and a profound admiration for the beauty of the natural world. It encourages patience, observation, and a continuous exploration of the beauty that surrounds us.
Macro Photography
Macro photography, often referred to as close-up photography, is a fascinating genre that focuses on capturing small subjects at a life-size or greater magnification. This allows viewers to see intricate details and textures that are often invisible to the naked eye, revealing the hidden beauty of the miniature world.
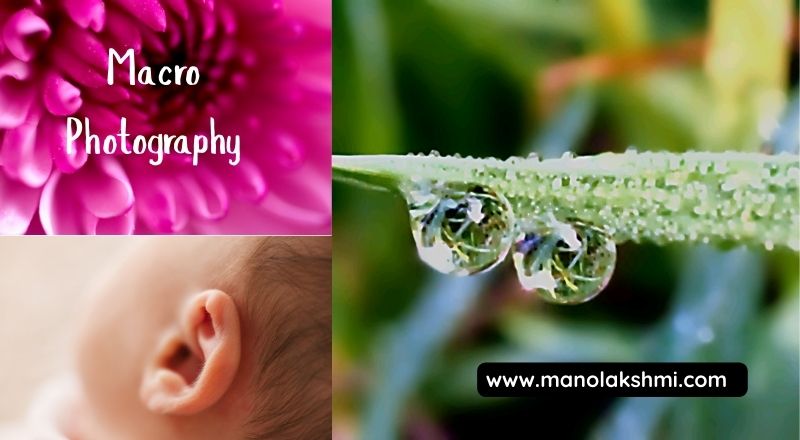
Key Concepts:
Close-ups: The fundamental aspect of macro photography involves getting extremely close to the subject. Attaining the required degree of magnification requires the application of advanced lenses and specialized methods.
Depth of Field: At high magnifications, the depth of the field becomes extremely shallow, meaning only a very narrow plane of the subject will be in sharp focus. Mastering depth of field is crucial for controlling which parts of the image are sharp and creating visually appealing compositions.
Techniques such as focus stacking can be utilized to enhance the perceived depth of the field.
Equipment for Macro: Several specialized pieces of equipment can enhance macro photography:
Macro Lenses: These lenses are designed with high reproduction ratios (typically 1:1 or greater), allowing the subject to be projected onto the sensor at its actual size or larger.
Extension Tubes: These hollow tubes are placed between the camera body and the lens, increasing the magnification by reducing the minimum focusing distance.
Close-up Filters: These screw onto the front of a lens and act like magnifying glasses, allowing for closer focusing.
Tripods: Essential for stability, especially at high magnifications where even slight movements can result in blurry images.
Remote Shutters: Help to minimize camera shake during exposure.
Macro Flashes and Diffusers: Provide controlled lighting to illuminate the small subjects and soften harsh shadows. Ring lights are a popular choice for even illumination.
Focusing Rails: Allow for precise forward and backward movement of the camera for fine-tuning focus, particularly useful for focus stacking.
Macro photography opens up a world of creative possibilities, allowing photographers to explore the intricate details of insects, flowers, textures, and everyday objects in a way that reveals their hidden beauty and complexity.
Wildlife Photography
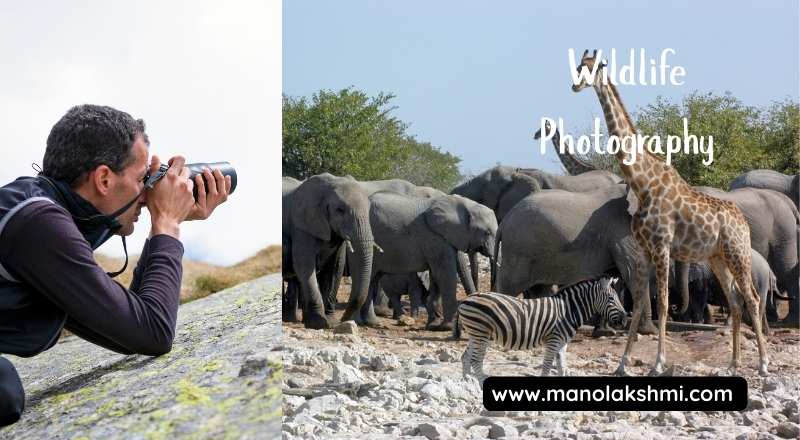
Wild photography is a captivating discipline that requires a unique blend of artistic creativity, technical proficiency, and deep respect for the natural world. It goes beyond simply capturing images of animals; it’s about telling stories, documenting behavior, and fostering an appreciation for biodiversity.
Patience: Success in wildlife photography often hinges on the ability to wait for the right moment. This may involve spending hours in a hide, tracking animals silently, or enduring challenging weather conditions for a fleeting glimpse of desired behavior.
Ethics: Ethical considerations are paramount in wildlife photography. Ensuring the subject’s well-being takes precedence over capturing the photograph. This includes avoiding any disturbance to habitats, never baiting or stressing animals for a shot, and maintaining a respectful distance. Understanding and adhering to local regulations and guidelines is also essential.
Techniques for Wildlife: The mastery of diverse photographic techniques is essential for creating captivating images. This includes understanding the interplay of aperture, shutter speed, and ISO in different lighting conditions.
Proficiency in autofocus systems, particularly tracking moving subjects, is necessary. Knowledge of different lenses and their appropriate use for varying distances and subjects is also key. Compositional techniques, such as the rule of thirds, leading lines, and creating a sense of place, can elevate wildlife photographs from mere documentation to artistic expressions.
Additionally, post-processing skills can enhance images, but should be used ethically to represent the scene accurately.
Event and Wedding Photography

Event and wedding photography centers on the art of visual storytelling, capturing the essence and emotion of special occasions. It goes beyond simply taking pictures; it involves weaving a narrative through carefully composed frames, preserving memories for years to come.
A key aspect of this genre is a candid approach, documenting authentic moments as they unfold naturally, rather than relying solely on posed shots. This requires keen observation skills, anticipating key interactions and emotions to capture genuine expressions of joy, love, and celebration.
Creating a comprehensive photographic record necessitates meticulous attention to timelines. From pre-event preparations to the final farewell, a skilled photographer understands the flow of the day and strategically positions themselves to capture all the significant milestones and in-between moments. Effective time management and a proactive approach are crucial for ensuring that no important detail is missed.
Beyond technical expertise and artistic vision, strong client relations are paramount in event and wedding photography. Understanding the client’s vision, preferences, and priorities is essential for delivering a final product that aligns with their expectations.
Open communication, active listening, and a collaborative approach contribute to a positive experience and ensure that the captured images truly reflect the unique personality and spirit of the event. Building trust and rapport with clients allows for a more comfortable and natural environment. Which often translates into more authentic and heartfelt photographs.
Commercial and Product Photography

Commercial and product photography focuses on creating visually appealing images of goods or services for promotional and sales purposes. This genre encompasses a wide range of applications, from advertising campaigns and marketing materials to e-commerce product listings and corporate websites.
Effective commercial and product photography requires a keen understanding of visual aesthetics, technical proficiency in lighting and composition, and an ability to translate the brand’s message and product features into compelling imagery.
Key elements in successful commercial and product photography include:
Lighting: Mastering both natural and artificial light sources is crucial for highlighting product details, creating desired moods, and ensuring consistent exposure. Techniques involve using studio strobes, softboxes, reflectors, and diffusers to control light direction, intensity, and quality.
Backgrounds: The choice of background plays a significant role in drawing attention to the product and creating a cohesive visual narrative. Options range from seamless white or colored backdrops for a clean and minimalist look to more elaborate sets that provide context and lifestyle elements.
Styling: Product styling involves arranging and presenting the items in an appealing and informative manner. This may include propping, arranging multiple items, and paying close attention to details such as angles, textures, and overall composition to enhance the product’s visual appeal.
E-commerce: Photography for e-commerce platforms demands high-quality, clear, and consistent images that accurately represent the product. Multiple angles, detail shots, and lifestyle images are often required to provide online shoppers. With a comprehensive view and instill confidence in their purchase decisions.
Keywords relevant to optimizing e-commerce product listings through photography include clarity, detail, multiple views, lifestyle, and mobile-friendly.
Fine Art Photography

Fine art photography transcends mere documentation, aiming instead to convey a vision, emotion, or concept. It is a deliberate and thoughtful practice where the photographer acts as an artist, utilizing the camera as a tool to express their inner world and engage with broader artistic dialogues. Unlike commercial or documentary photography, the primary goal is not to fulfill a client’s needs or record factual information, but rather to create aesthetically compelling and intellectually stimulating images that stand alone as works of art.
Conceptual Art:
A significant aspect of fine art photography often involves conceptual underpinnings. The idea behind the photograph takes precedence, guiding the photographer’s choices regarding subject matter, composition, lighting, and post-processing. The final image serves as a visual manifestation of this underlying concept, inviting viewers to contemplate.
Its meaning and engage with the photographer’s intellectual framework. This approach can involve exploring abstract ideas, social commentary, philosophical inquiries, or personal narratives through carefully constructed visual metaphors and symbols.
Personal Expression:
At its core, fine art photography is deeply rooted in personal expression. It provides a medium for photographers to articulate their unique perspectives, experiences, and emotions. Through their photographic choices, artists reveal their individual ways of seeing the world.
Offering viewers a glimpse into their subjective realities. This personal voice is what distinguishes fine art photography and allows it to resonate with audiences on an emotional and intellectual level.
The work often reflects the photographer’s inner landscape, their concerns, and their aesthetic sensibilities.
Gallery Representation:
For many fine art photographers, securing representation in reputable art galleries is a crucial step in their artistic journey. Galleries provide a platform for showcasing and selling their work to a discerning audience of collectors, curators, and art enthusiasts.
Representation signifies a level of recognition and validation within the art world, offering opportunities for exhibitions, critical engagement, and professional development.
Galleries act as intermediaries, connecting artists with the market and contributing to the broader discourse surrounding contemporary photography. The pursuit of gallery representation often involves building a strong and cohesive body of work that demonstrates artistic vision, technical mastery, and a unique perspective.
Post-Processing Techniques
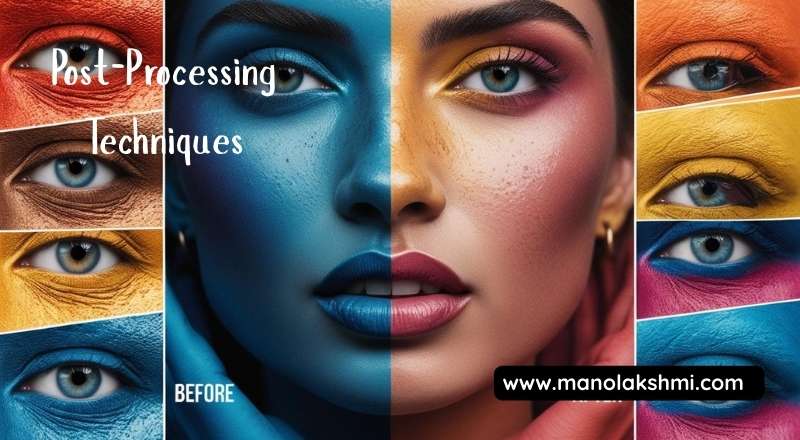
Editing Software Overview
This document provides a brief overview of popular editing software commonly used in digital photography and image manipulation workflows. The software listed represents a range of options catering to different skill levels, professional needs, and budgetary considerations.
Key Software Options:
Adobe Lightroom: A comprehensive photo management and editing application known for its non-destructive editing capabilities, robust cataloging system, and seamless integration with Adobe Photoshop. It is widely used by professional and amateur photographers for tasks ranging. From basic adjustments to advanced color grading and local corrections.
Adobe Photoshop: The industry-standard image editing software offering an extensive suite of tools for retouching, compositing, graphic design, and digital painting. Its layer-based system allows for complex manipulations, and it supports a wide variety of plugins and extensions for specialized tasks.
Capture One: A high-end image editing software particularly favored by professional photographers. For its exceptional raw processing engine and tethering capabilities. It offers precise color control, advanced masking tools, and a customizable interface designed for efficient workflow in studio environments.
Affinity Photo: A professional-grade photo editing application positioned as a more affordable alternative to Adobe Photoshop. It provides a comprehensive set of features, including raw editing, layer support, retouching tools, and vector capabilities, making it suitable for photographers and graphic designers alike.
These software options utilize various editing techniques, including parametric adjustments. (Lightroom, Capture One) and pixel-based manipulation (Photoshop, Affinity Photo). Offering users flexibility in how they approach image processing. The choice of software often depends on the user’s specific needs. The complexity of their editing tasks, and their preferred workflow.
Basic Editing Techniques
This section outlines fundamental image editing techniques essential for enhancing the visual appeal and quality of photographs and digital artwork. These techniques form the bedrock of more advanced editing workflows and are crucial for achieving desired aesthetic outcomes.
Cropping:
This technique involves removing unwanted areas from the periphery of an image. Cropping serves several purposes, including:
- Improving Composition: By eliminating distracting elements and focusing attention on the subject.
- Changing Aspect Ratio: Adapting the image to fit specific display requirements or artistic visions (e.g., square, widescreen).
- Straightening Horizons: Correcting tilted perspectives for a more balanced visual presentation.
- Resizing for Specific Outputs: Preparing images for printing or online platforms with particular size constraints.
Color Correction:
This encompasses a range of adjustments aimed at achieving accurate, natural-looking, or stylistically intentional colors within an image. Key aspects include:
- White Balance: Correcting color casts caused by different lighting conditions (e.g., tungsten, daylight) to ensure white objects appear truly white.
- Exposure Adjustment: Modifying the overall brightness and darkness of an image to recover lost detail in shadows or highlights.
- Contrast Adjustment: Enhancing the difference between light and dark areas to increase depth and visual impact.
- Hue, Saturation, and Luminance (HSL) Adjustments: Fine-tuning individual color ranges to alter their tint, intensity, and brightness, allowing for targeted color manipulation.
Sharpening:
This technique enhances the edges and details within an image, making it appear more focused and crisp. Sharpening works by increasing the contrast along edges.
However, it’s crucial to apply sharpening judiciously, as over-sharpening can introduce unwanted artifacts and noise. Different sharpening methods and parameters exist to control the intensity and radius of the effect.
Noise Reduction: Digital noise refers to random variations in brightness or color information, often appearing as graininess, especially in low-light conditions. Noise reduction techniques aim to minimize this visual disturbance, resulting in smoother images.
Advanced Editing Techniques
Advanced image editing goes beyond basic adjustments like brightness and contrast, employing sophisticated techniques to create compelling visuals. These methods often involve working with layers, which allow for non-destructive editing and the manipulation of individual elements within an image.
Layering: This fundamental technique involves stacking multiple images or adjustments on top of each other, each residing on its own transparent layer. Layers can be rearranged, blended, and have their opacity adjusted to achieve complex effects. Adjustment layers allow for color and tonal corrections to be applied to an image without permanently changing the original pixels. These layers offer non-destructive image editing.
Masking: Masks are used to selectively control the visibility of different parts of a layer. A mask acts like a stencil, revealing certain areas while concealing others. This allows for seamless integration of different image elements or the application of effects to specific portions of an image. Common masking techniques include layer masks (pixel-based) and vector masks (shape-based), each offering different levels of precision and flexibility.
Composite Images: Combining elements from multiple photographs or digital assets to produce a unified artwork is known as creating composite images. This often necessitates precise masking, careful attention to perspective and lighting, and skillful blending.
To ensure a realistic or intentionally surreal outcome. Compositing allows for the creation of scenes that might be impossible to capture in a single photograph.
Retouching: Retouching encompasses a range of techniques aimed at enhancing and refining an image by removing imperfections, smoothing textures, and subtly altering details. This can include tasks such as removing blemishes from skin, eliminating unwanted objects from a scene, or subtly reshaping features.
Advanced retouching often involves techniques like frequency separation and dodging and burning to maintain natural-looking textures and tonal variations.
Exporting and Printing
This section focuses on the crucial final stages of image processing: exporting and printing. Careful consideration of these steps ensures that the digital work translates effectively into a final, viewable, or tangible format.

File Formats:
Choosing the appropriate file format is paramount for both digital sharing and printing. Various formats exist, each designed for specific applications and providing different degrees of compression and image fidelity.
JPEG (Joint Photographic Experts Group): A widely used lossy compression format ideal for sharing images. Online and for general-purpose use where smaller file sizes are preferred. However, due to its lossy nature, each save can result in a gradual degradation of image quality. Making it less suitable for archival or extensive post-processing.
TIFF (Tagged Image File Format): A lossless compression format that retains all image data, making it excellent for archival purposes, professional printing, and situations where image quality is critical. JPEGs have smaller file sizes compared to TIFF files.
RAW: Data captured directly from a camera sensor is stored in a designated format. For maximum flexibility in post-processing, this format enables extensive adjustments to parameters like white balance and exposure without any quality degradation. However, RAW files require specialized software to open and edit, and are not directly printable. They need to be processed and exported to a more common format like JPEG or TIFF for sharing or printing.
Calibration:
Accurate color reproduction is essential for achieving desired results in both digital displays and prints. Calibration involves ensuring that your monitor accurately displays colors and that your printer outputs colors consistently.
Monitor Calibration: Using a hardware colorimeter or spectrophotometer to create a custom color profile for your monitor ensures that the colors you see on screen are as accurate as possible. Informed editing decisions rely on this crucial aspect.
Printer Calibration and Profiling: Similar to monitor calibration, creating a custom color profile for your printer and chosen paper type ensures that the printed output closely matches what you see on your calibrated monitor. Color calibration frequently includes printing a test chart followed by analyzing the color accuracy using a spectrophotometer.
Print Settings:
The settings chosen during the printing process significantly impact the final output. Precise calibration of these parameters is essential to attain the intended quality and appearance.
Paper Selection: The type of paper used (e.g., glossy, matte, textured) greatly influences the look and feel of the print.
Resolution (DPI – Dots Per Inch): The print detail level is controlled by this setting. Higher DPI values result in sharper images with finer details but also larger file sizes and longer printing times. Common DPI settings for printing range from 300 DPI for high-quality photo prints to lower values for proofs or larger format prints viewed from a distance.
Color Management: Ensure that color management is properly configured in your printing software to utilize the monitor and printer profiles. Accurate color reproduction depends critically on this step.
Print Quality Settings: Most printers offer various print quality settings (e.g., draft, normal, best). Selecting a higher quality setting generally results in finer detail and smoother tonal gradations, but consumes more ink and takes longer to print.
Margins: Adjust margins as needed to control the white space around the printed image.
Rendering Intent: This setting determines how colors are converted. When the color space of the image differs from the color space of the printer. Different rendering intents prioritize different aspects of color accuracy and are suitable for various types of images.
Creative Techniques and Styles

Creative Photography Techniques
Delve into innovative methods that push the boundaries of traditional photography.
Double Exposure: Explore the art of layering two or more images onto a single frame, creating surreal and dreamlike effects. Experiment with different subjects, densities, and compositions to achieve unique visual narratives. Consider both in-camera techniques and post-processing methods for blending exposures.
Panning: Capture the essence of motion by panning your camera horizontally to follow a moving subject. This technique will yield a sharply focused subject contrasted against a motion-blurred background, creating a dynamic visual effect. Practice adjusting your shutter speed and tracking skills to achieve the desired level of blur and subject clarity.
Infrared Photography: Explore the unseen infrared spectrum by employing specialized filters or modified cameras. Capture otherworldly landscapes and portraits with unique tonal renditions, where foliage appears bright white and skies turn dramatic shades. Explore the creative possibilities of black and white and false-color infrared imagery.
Film Simulation: Digitally recreate the visual appeal of traditional film with emulations that capture their classic aesthetic. Explore various film simulations available in modern cameras and post-processing software to imbue your images with distinct color palettes, grain structures, and tonal curves reminiscent of beloved analog films. Experiment with different genres and subjects to discover how film simulations can enhance your visual storytelling.
Experimental Photography
Venture beyond conventional photographic practices and explore unconventional approaches to image-making.
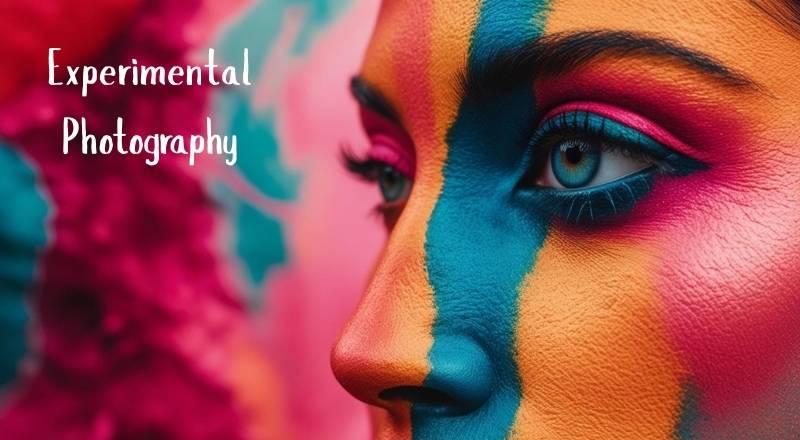
Alternative Processes: Investigate historical and non-traditional photographic printing methods such as cyanotypes, salt prints, Van Dyke brown prints, and liquid emulsion techniques. Embrace the hands-on nature of these processes and the unique aesthetic qualities they impart to your images. Experiment with different materials, toners, and surface textures to create one-of-a-kind photographic objects.
Mixed Media: Integrate photography with other artistic mediums, such as painting, drawing, collage, or sculpture. Explore ways to physically alter or embellish photographic prints. (or) combine photographic elements with other materials to create multi-layered and conceptually rich artworks. Consider the interplay between different textures, colors, and forms to convey new meanings.
Photography as Art: Conceptualize and execute photographic projects that transcend purely representational purposes. Explore themes, ideas, and emotions through carefully constructed images or series of images. Consider the theoretical and historical contexts of fine art photography and how your work engages with broader artistic dialogues.
Personal Style Development
Cultivate a distinctive and recognizable visual approach that reflects your individual perspective and creative vision.
Finding Your Voice: Embark on a journey of self-discovery to identify your unique interests, perspectives, and artistic sensibilities. Experiment with different genres, techniques, and subjects to understand what resonates with you most deeply. Reflect on your motivations for creating and the messages you wish to convey through your photography.
Influences: Acknowledge and analyze the work of photographers and other artists who inspire you. Study their techniques, compositions, and thematic concerns. However, strive to synthesize these influences into your own unique visual language rather than simply replicating the work of others. Explore diverse sources of inspiration beyond photography, such as literature, music, and cinema.
Consistency: Develop a cohesive body of work characterized by recurring visual elements, thematic interests, or conceptual approaches. While experimentation is valuable, strive for a sense of visual unity that allows viewers to recognize your distinct style. Pay attention to recurring patterns in your color palettes, compositions, subject matter, and overall aesthetic.
Working with Clients and Models
Client Relationships
Establishing and maintaining strong client relationships is fundamental to success. This involves several key aspects:

Contracts: Clear, comprehensive contracts are essential. The essential components of these documents should be a clear definition of the work’s scope. Project timelines, payment schedules, intellectual property ownership, confidentiality obligations, and conditions for contract termination. Clear contracts are essential for preventing confusion and safeguarding the interests of all involved parties.
Communication: Open, consistent, and proactive communication is vital. This includes regular updates on progress, promptly addressing client queries and concerns, actively listening. To their feedback, and clearly articulating any potential challenges or deviations from the original plan. Utilizing various communication channels effectively (e.g., email, phone calls, video conferencing) is crucial.
Pricing: Transparent and fair pricing structures are necessary. Whether it’s based on an hourly rate, project fee, or retainer. Any potential additional charges should be communicated and agreed upon in advance. Providing value for the price charged is paramount for long-term relationships.
Deliverables: Clearly defined and agreed-upon deliverables are critical. Objectives should align with the SMART framework: Specific, Measurable, Achievable, Relevant, and Time-bound. Regular reviews of progress against deliverables ensure alignment and client satisfaction. Managing expectations about the quality and format of deliverables is equally important.
Working with Models
When the work involves models, additional considerations regarding their direction, comfort, and ethical treatment are paramount:
Directing: Providing clear, concise, and constructive direction is essential for achieving the desired outcome. To ensure the desired outcome, clear communication is crucial. This entails articulating the vision, defining specific poses and expressions, and detailing the overarching aesthetic. Positive and encouraging feedback can help models perform their best.
Rapport: Building rapport with models fosters a comfortable and collaborative working environment. Taking the time to connect with the model, showing respect for their time and effort, and creating. A relaxed atmosphere can lead to better results and a more positive experience for everyone involved.
Comfort Techniques: Ensuring the model’s comfort and well-being is of utmost importance. This includes providing adequate breaks, comfortable changing areas, appropriate temperature control, and addressing any concerns they may have. Being mindful of posing and wardrobe choices that could cause discomfort is crucial.
Ethical Considerations: Maintaining high ethical standards is non-negotiable. This includes obtaining informed consent for the use of images. (or) performances, respecting the model’s privacy, avoiding any form of exploitation or harassment, and adhering. To all relevant legal and industry regulations regarding the treatment of models. Transparency about the intended use of the material and fair compensation are key ethical considerations.
Visit and support our page: Digital Photography: Best Tips for handling methods
